First Steps In 3D Printing With Foldarap
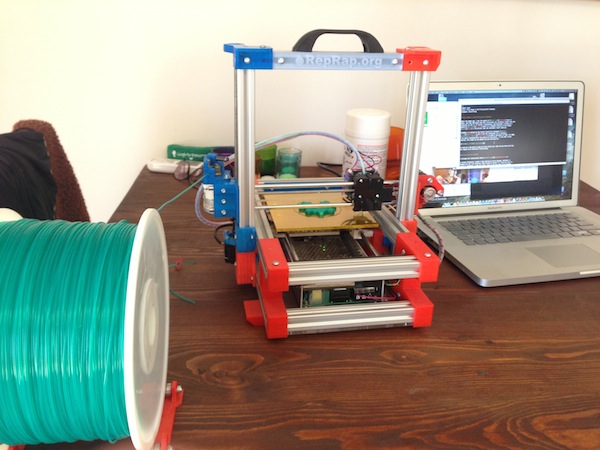
About two weeks ago, I met the people of Jokko Labs here in Dakar, and they mentioned they had a 3D printer but currently lacked time and resources to use it. Of course I volunteered, and yesterday I picked up a beautiful FoldaRap which is a foldable version of the famous RepRap: a 3D printer than can reproduce itself (mostly).
FoldaRap is a design by the french (cocorico!) designer Emmanuel Gilloz and if you are interested, he is running a crowdfunding campaign to make a new batch of them. This printer can be folded for easy transport and is really compact. It can still print objects as big as 140x140x140mm.
For 600€, I am really impressed with the quality of the prints - If you want to get started, this might be the moment you were waiting for!
It took me a few hours to get my first prints out. Here are my notes and tips for anyone else starting in 3d printing.
The history of this printer
Emmanuel came to Dakar in november 2012 during InnovAfrica 2012 with all the parts to build this 3D printer and assembled it here in 4 hours (you can also look at the FoldaRap Build Manual):
The printer now belongs to Jokkolabs, a coworking space and will soon be available to everyone at the AUF (Alliance Universitaire de la Francophonie) in a dedicaded “Makers room” along with a CNC machine and some other tools.
If you live in Dakar and are interested in 3D printing, send me an email or follow me on twitter, we will be doing workshops on 3D printing in may and june.
Getting started in 3D printing
I had already printed some parts online for Loochi and I have seen many 3D printers in action but this was my first time in command.
I recommend reading the FoldaRap User’s Manual for detailed instructions. In a nutshell, you need:
-
A 3d modeler to build the 3D objects that you will print. The output format you need is STL. You can use Blender, Google Sketchup (with a STL plugin), Solidworks, OpenScad, etc.
If you want to get started right away, you can skip this first step and go to thingiverse.com, choose an object that you would like to print and download the STL file directly.
-
A program to transform your STL files into GCode. GCode is the low level input to every 3D printers (like PostScript). It gives us detailed instructions like Move there on this axis, Start extruding plastic, etc.
I have used Slic3r.
-
A program to speak to the printer and transfer the GCode to the printer. The most popular program for the RepRap printers is Pronterface.
Install the software
Slic3r
This is trivial, just download the package for your platform (MacOS/Linux/Windows are all supported) and follow the instructions. It was straightforward.
I used the settings provided by Emmanuel in the FoldaRap github.
Important: In Printer Settings, make sure the Z-Offset is set to 0mm. It was not for me and is important to get good results.
Pronterface
Pronterface is part of a suite of tools called Printrun. I followed the instructions from Anthony’s page to install them on a Mac.
It worked flawlessly, except I kept getting an error message ‘wxPython is damaged and can’t be installed’ when trying to install it. Turns out this is caused by GateKeeper in Mac OS X 10.8. This is not the usual error message (probably because it’s a .pkg and not a .dmg) so I did not realize this was the problem before I had downloaded different versions from different sources … This problem is logged and the workaround (just disable GateKeeper to install it) described here.
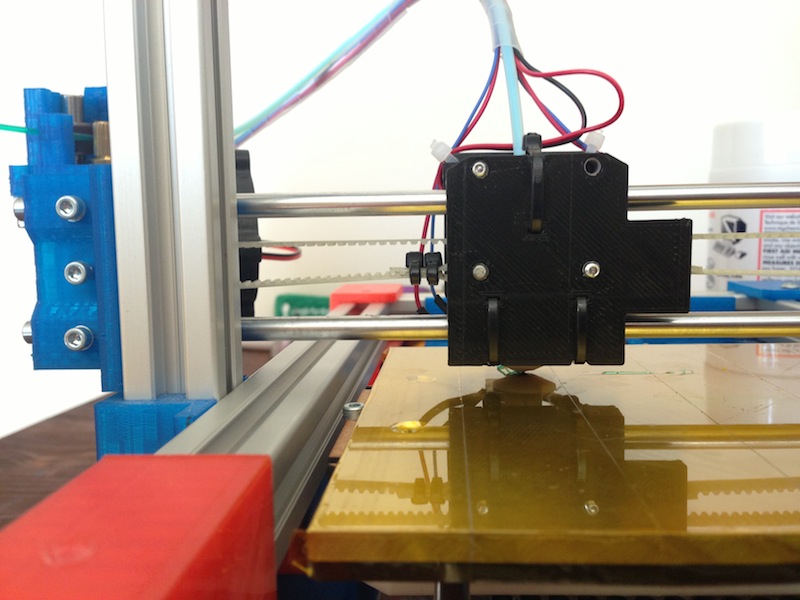
Take control of the printer
Once pronterface is installed, just launch it, select the USB serial port of the printer, 250000 bauds and click connect. The printer should respond and you will see the main window.
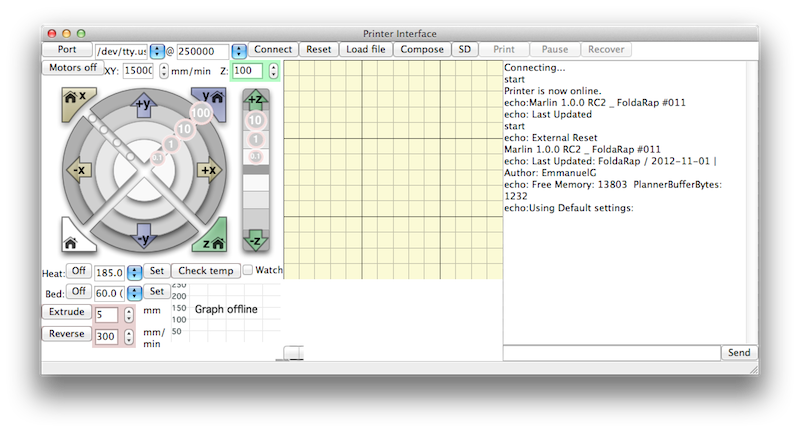
Set the proper value for the printer size (Settings->Options):
- Build Dimensions (build_dimensions): 140x140x100+0+0+0
- Bed Temperature for PLA (bedtemp_pla): 55°C
- Temperature of the head for PLA (temperature_pla): 195°C
And in the main window, set the speed of the head:
- XY: 15000 mm/min - 2: 100mm/min
You can use the arrows on screen to move the printer head. Make sure all the heads move correctly. Use the “Home” button to bring the printer back to its default position.
I had a problem on the Y axis, and it was not moving well in one direction. Tightening the plastic part that holds the pulley on the opposite side of the motor fixed that.
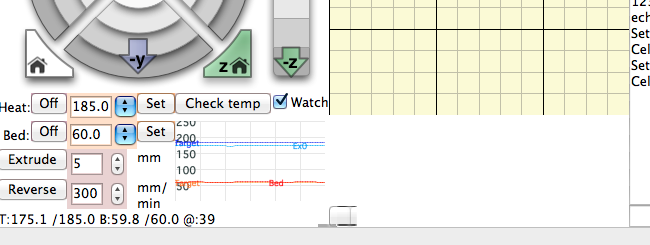
Heating the printer head and bed
The bed of the printer (the plate where you print) is heated to help the plastic hold onto it and make sure it keeps its shape when it cools down.
Before you start printing, pre-heat the bed and the extruder (the moving head that mets the plastic). Below the arrows on screen, select the temperatures for PLA (they are pre-set) and click on the set button twice. Enable the “Watch” checkbox and you will see a small graph appear with the temperature of the bed and head.
Put some filament in the printer
The “cartridge” in an extrusion 3D printer is a plastic filament that comes on a big roll. Before you can print, you have to feed that filament to the printer.
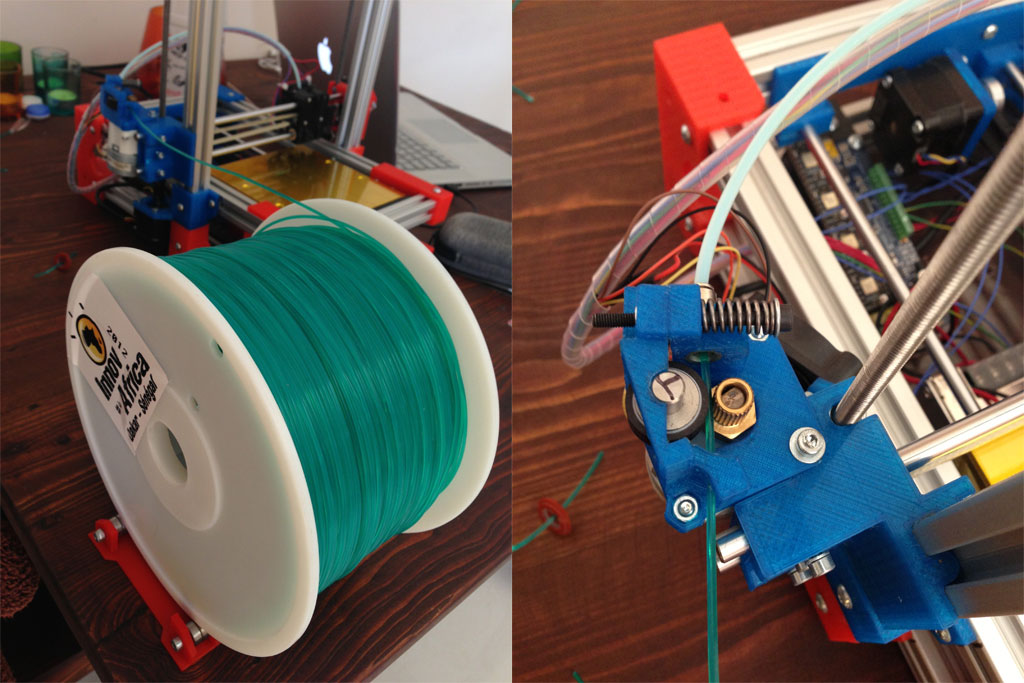
I could not find instructions on how to do that but it is pretty simple. First thing you need to know is that the printing head needs to be hot.
Then use the button in Pronterface to move the filament feeder (the stepper motor that controls the speed at which it goes in the extrusion head). You can move in both directions to feed the filament in or to remove it.
I had a small piece of filament left in the printer. I tried to remove it but it broke and I had to disassemble the feeder motor to remove the old filament. Conclusion: always completely remove the filament before you pack the printer.
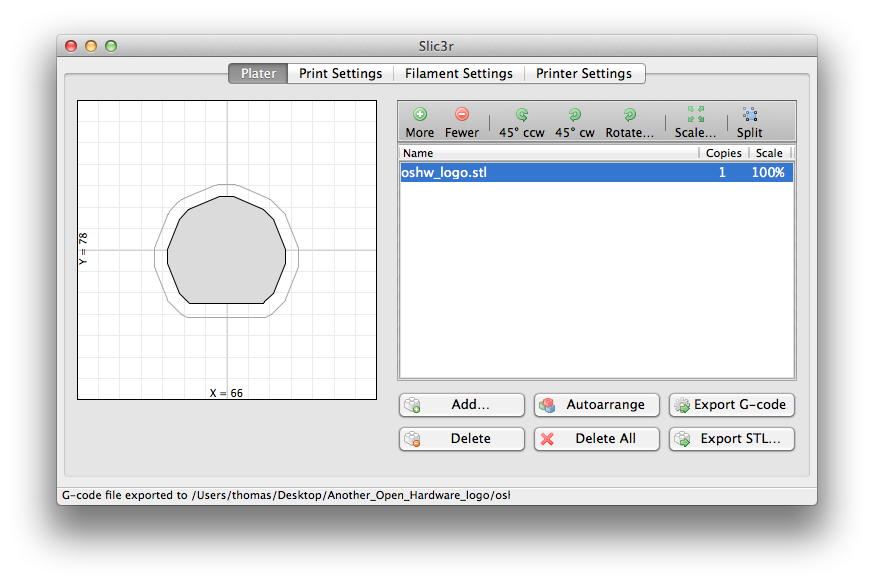
Your first GCode
I downloaded an Open Hardware Logo on Thingiverse by Emmanuel. It’s small enough that you dont care if it does not work as expected, and prints in a short amount of time (~12 minutes).
Open this STL file in Slic3r. In the Print Settings, choose how you want the inside of the object to be filled (I chose line the first time and then honeycomb), and then click on the Export G-Code button.
And your first print!
In Pronterface, click on “Load file”, select your GCode and then click on the Print button. You will see the printer starts moving and in about 10’ you will have your first print!
Calibration
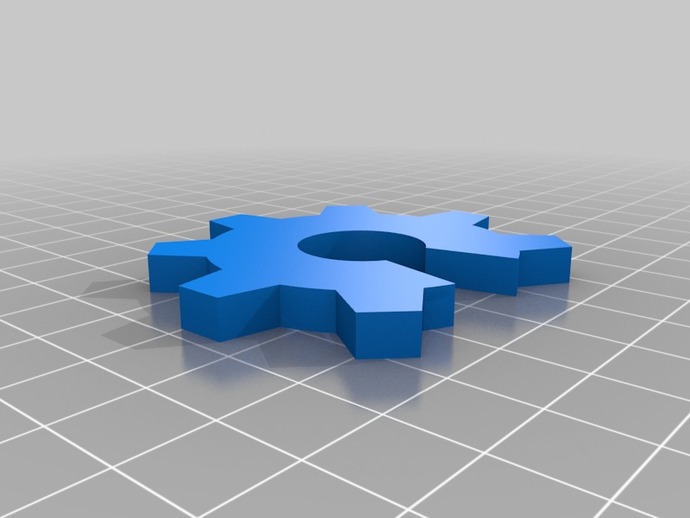
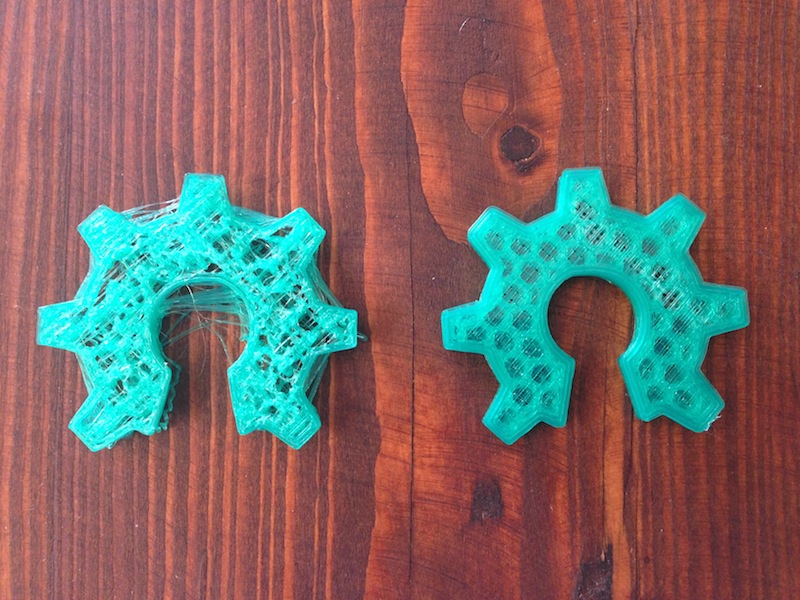
I was really excited to see my first print come out of the printer but the quality was obviously not what I expected.
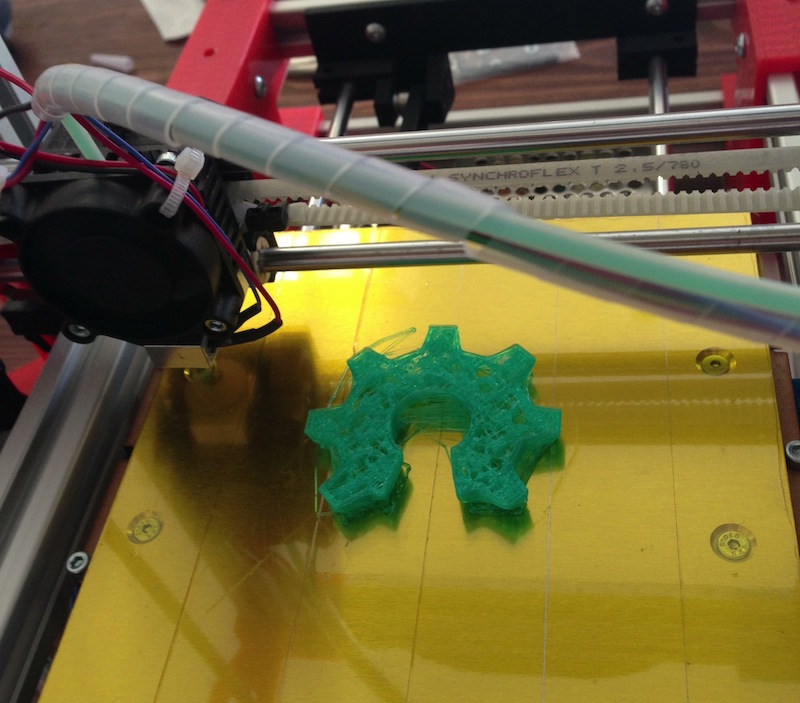
I could tell during the first print that the head was way too high when it started printing and I knew I had to “level the bed”: make sure the bed is flat under the printing head.
I think I spent at least 1/2 an hour doing that. There are 3 screws and you move the head from one corner to another, adjusting the screws so that the head just barely touches the bed when you press the “Z Home” button in Pronterface (instructions in the FoldaRap manual). Of course, when you think it’s perfect, you realize one corner is too low or too high … This step is not specific to FoldaRap and is something you have to do with all extrusion 3D printers but it is a real pain!
However, it paid off pretty well. The second print (on the right on the picture) is much much nicer.
Conclusion
I cant believe it took me so long to get into 3D printing. Having the possibility to print all sort of objects directly at home is absolutely amazing and I have tons of ideas!
I thought I would need a $2000 printer to get decent prints but this FoldaRap is small, easy to carry and I am really impressed by the quality of the prints. I think I will have a hard time not joining the next batch and I encourage you to jump in as well!
I will post some more pictures of my prints on my twitter feed - If you have an idea of something you would like to try, shoot me an email!
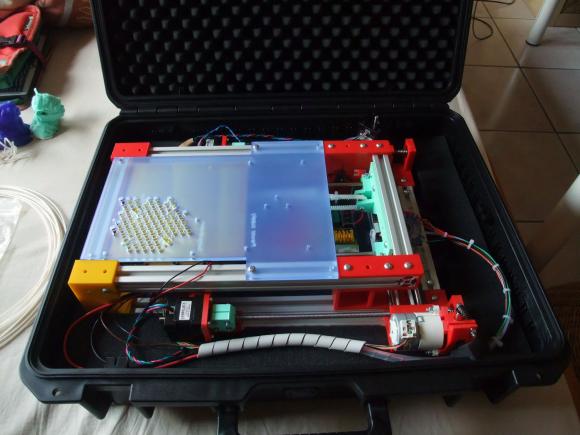 A foldarap in a suitcase - Image copyright Emmanuel Gilloz